Enter a permit manually
Daily workflow
Use manual entry when the permit cannot be imported by email.
Add a permit
- Open the Work Order.
- Scroll to Permits.
- Select Add.
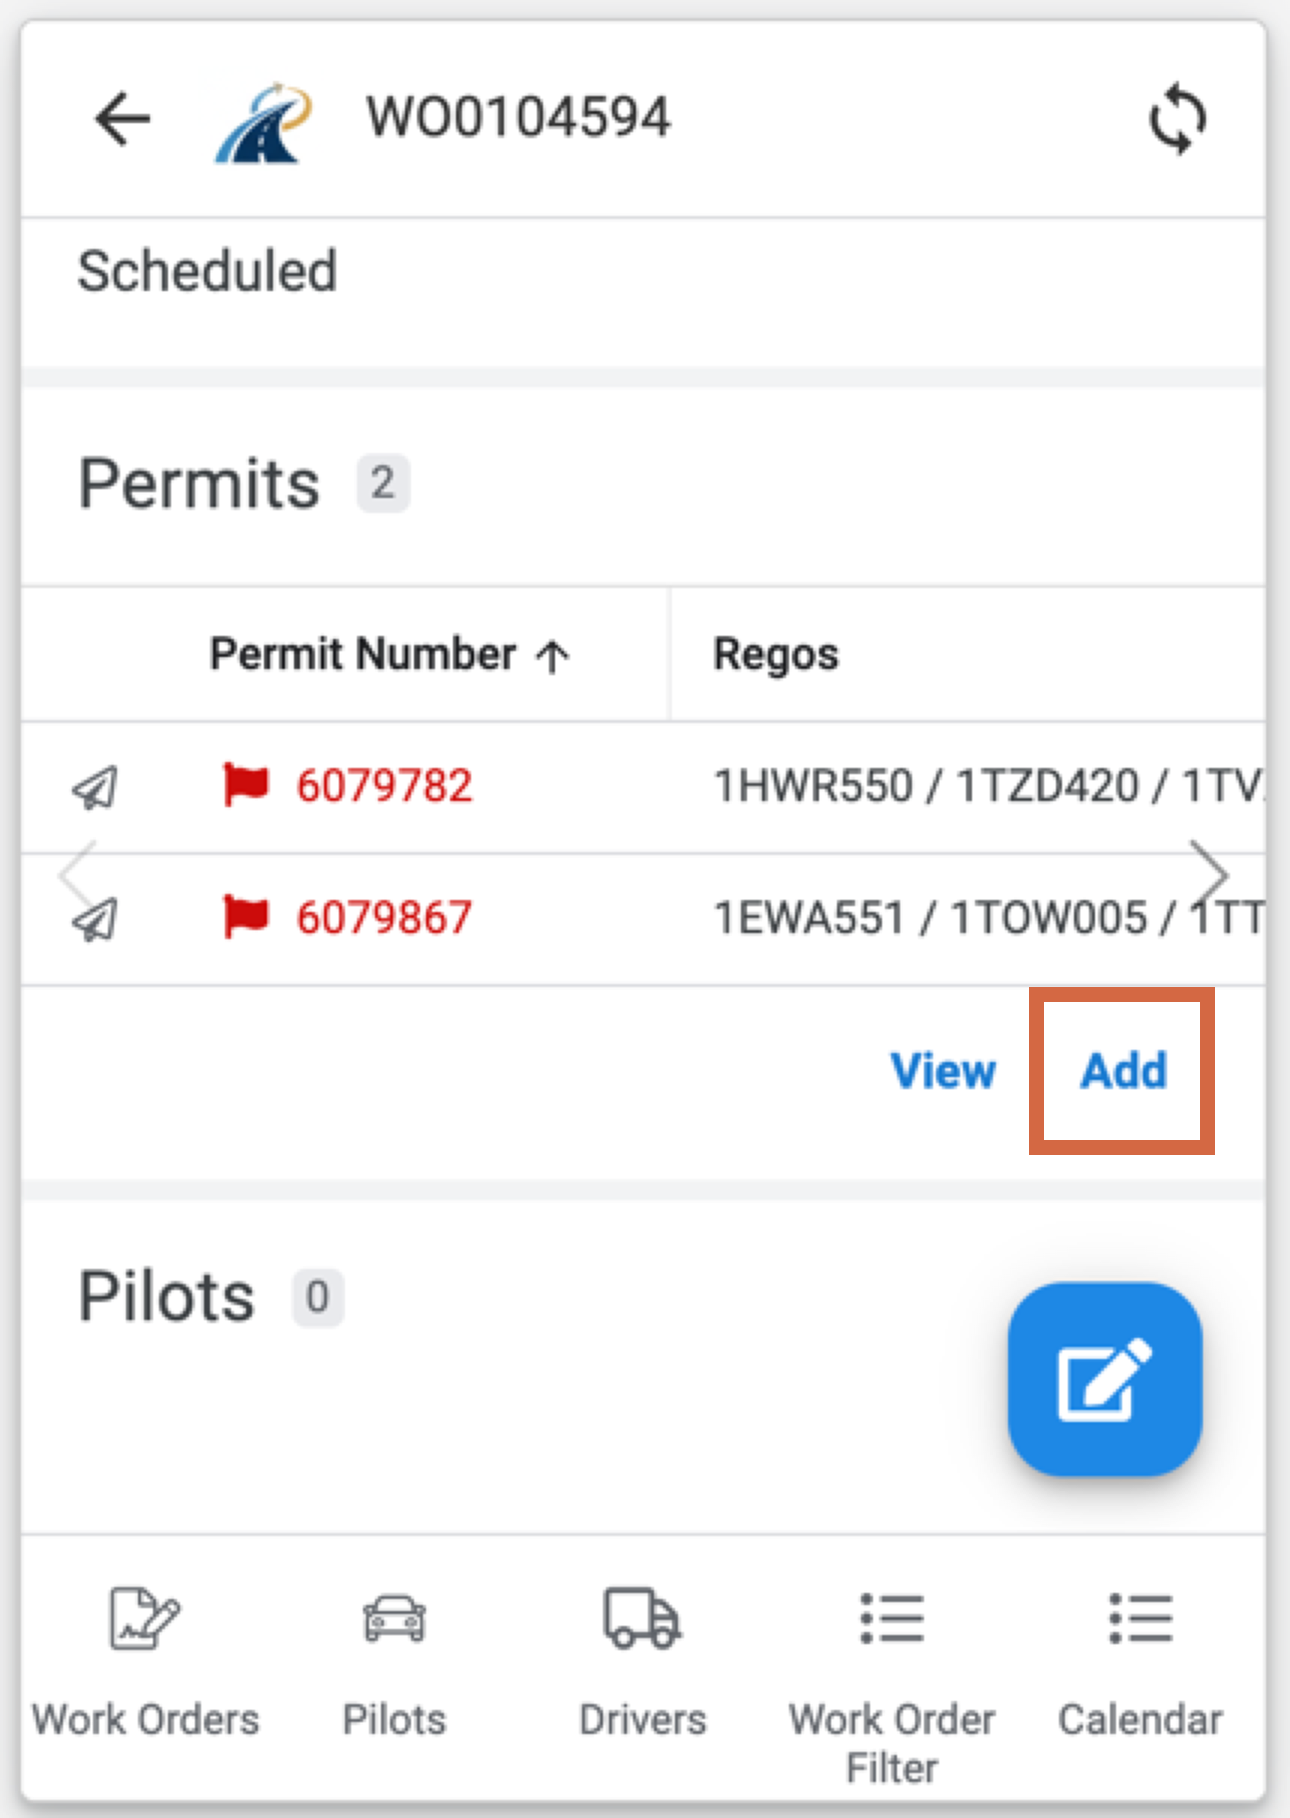
Enter permit references and dates
Using the permit PDF, enter the applicable details:
- permit number and validity dates
- low-loader permit details and dates
- power permit details and dates
Enter the permitted dimensions
Enter the applicable permitted dimensions and conditions:
- width, height and length
- raised and lowered heights
- ground clearance and ground-clearance conditions
- dolly and trailer ground contact
- overhang and forward or rear projections
Select Next when the permit details are complete.
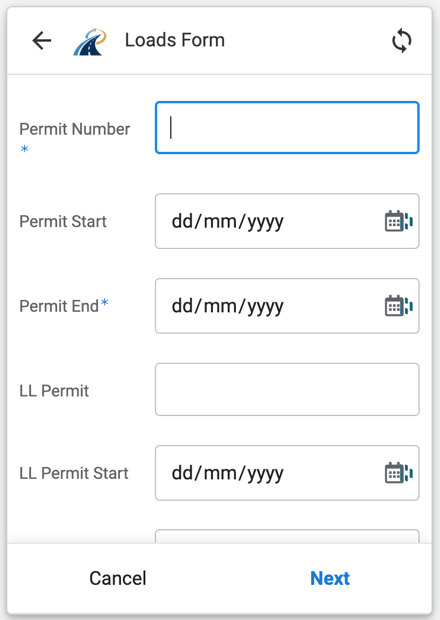
Add the transport company and vehicle registrations
Enter the transport company and the applicable truck, dolly and trailer registrations.
When a registration already exists, the app displays its saved expiry date. Check the date and update it where required. The system will also attempt to retrieve the expiry date for WA registrations.
Registration expiry dates are shared for future use, so check them carefully before saving.
Select the axle source
Scroll to Axle Source and select the correct option. Available options are:
- Platform
- Low Loader
- 8 Tyre Per Axle
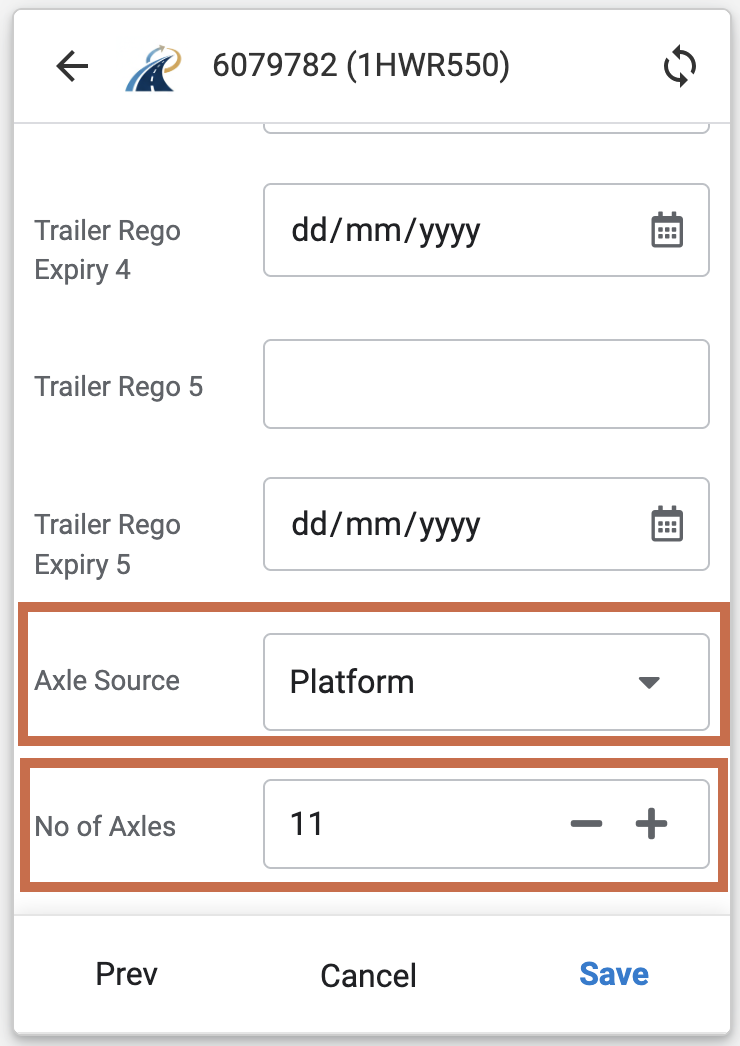
Select the axle details
Depending on the axle source, enter either:
- the total number of axles for the prime mover, dolly and platform; or
- the available axle configuration, such as 1.7 or 2.3.
Select Save. The permit is now attached to the Work Order.